


In this article, I’m going to show you how to make a simple do-it-yourself lightbox that you can use for miniature photography.
Sometimes when taking pictures on some of my collectibles or any small object, I use my DIY Lightbox. I even sometimes use it on photos I use on the blog. It is very handy because it gives me a very good lighting on the object and in turn I get great pictures.
A lot of my friends keep asking me on how to make a Lightbox, so here is an instruction on how to make my version of Lightbox (Since there are a lot of ways you can go about to making one.).
Materials:
- A big box
- White cloth
- Illustration board
- Double sided tape (You can also use Blu Tack)
Optional Materials:
- White cartolina paper
- Clips (An alternative the double sided tape)
Instruction:
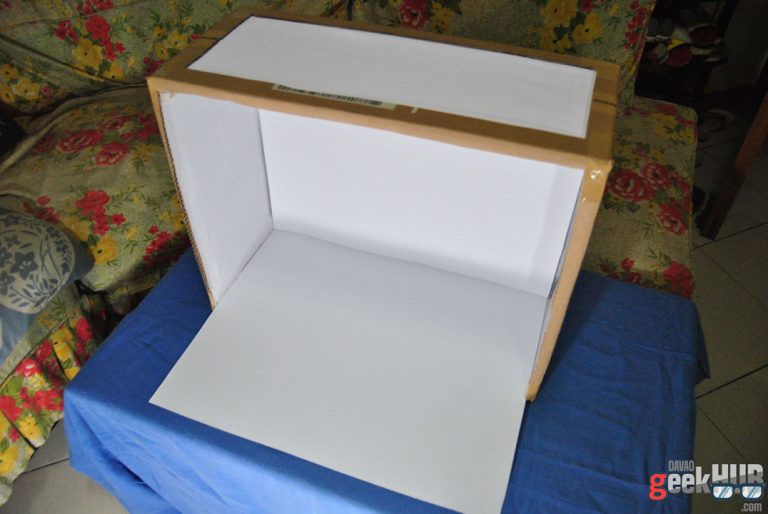
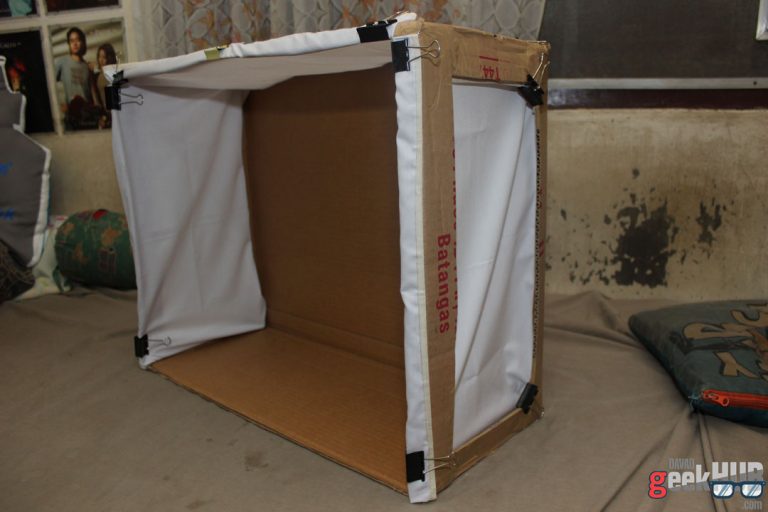
- Using a cutter, cut the front of the box. Then cut the sides leaving a margin, do this at the top also. See image.

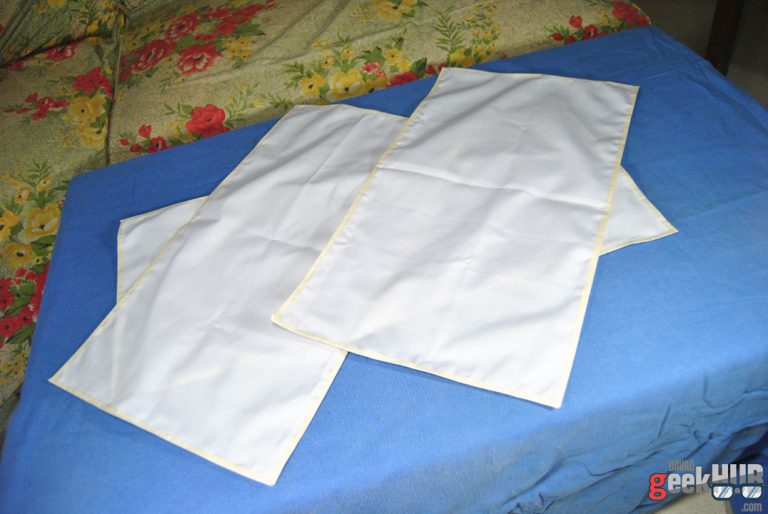
- Cut 3 pieces of cloths, make the size larger than the holes on the side and top of the box.
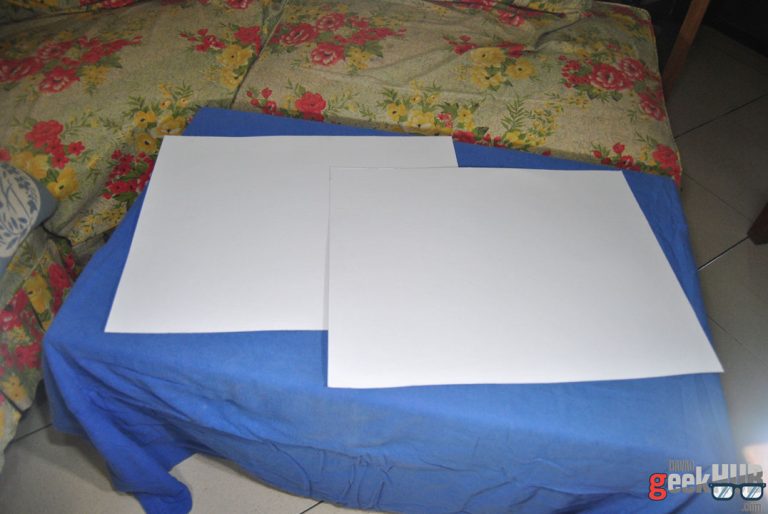
- Cut 2 illustration boards with the same size as the back of the box.
- Using a double sided tape or any adhesive, stick the cloths to the top and side holes from the inside, covering the hole.
- Place 1 illustration board inside the box at the back (You can use adhesive if you want). Place the other illustration board at the bottom of the box.
- Place a light source in each hole (You can use desk lamps. In my case, I built a wooden frame and screwed in some LED light bulbs).


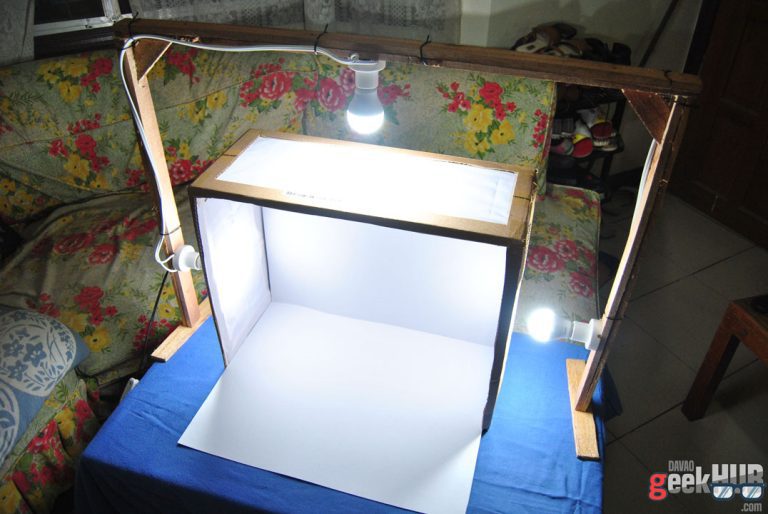
And there you have it, your very own Lightbox. You can check some photos I took of some objects in the house with it below.

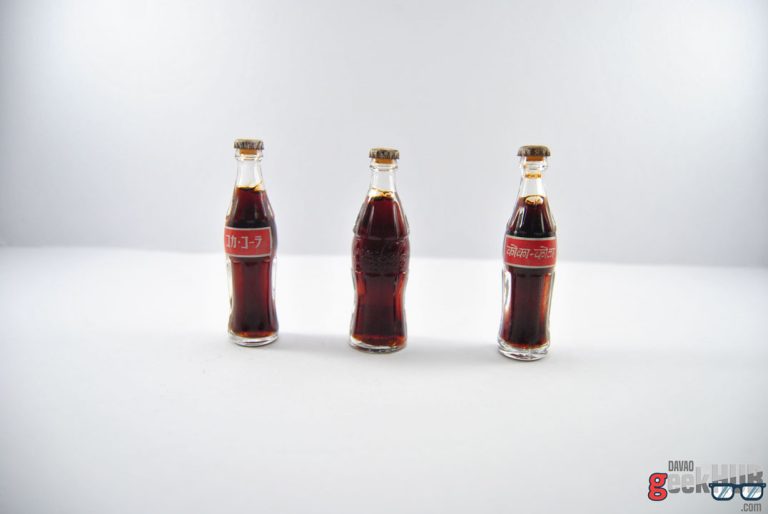
The reason why I also chose to use illustration boards is because if ever you want a black background, simply turn the illustration boards over. Sample photos below.


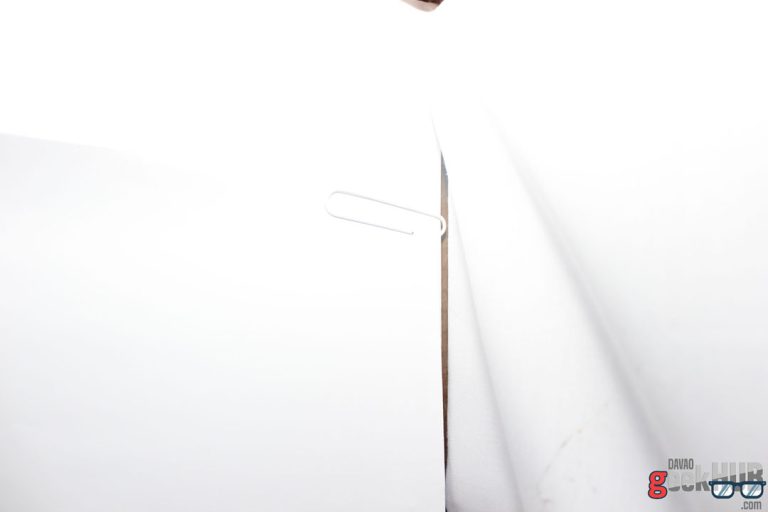
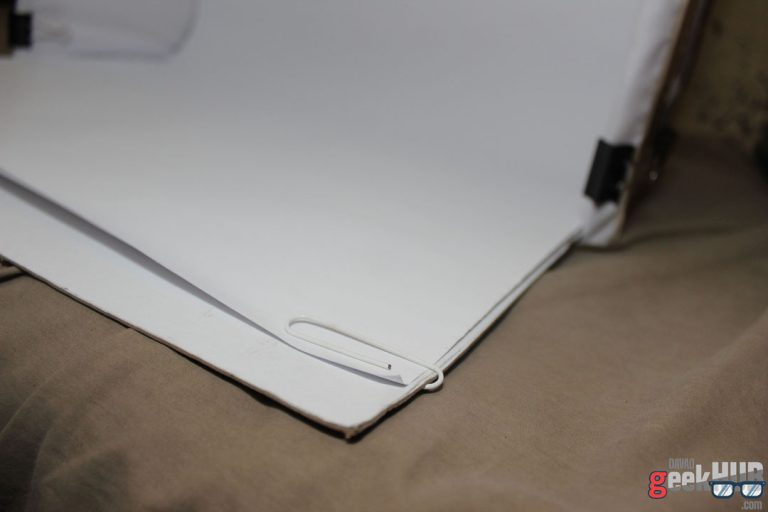
Wait there’s more. You can still improve your Lightbox with a couple of changes I made. Instead of using double sided tape or any adhesives, I switched to using clips instead. The reason is simple, so I can take the cloths off and on faster. The white cloth gets dirty over time and it would be helpful when it is easier and faster to take them off the Lightbox in order to wash them.

Another improvement I made is using cartolina paper for the background. I use it as the background in order to hide the line at the bottom of the illustration board that’s very visible on camera. You can just simply clip the cartolina paper on the illustration board, making sure it doesn’t fold so there won’t be any lines on the background. You can also use different colors of cartolina paper for different colors of background.


To keep track on Davao Geek Hub’s future updates, like/follow us on Facebook, Twitter, YouTube, Instagram, Google+, and Pinterest.

